We currently support Outlook 2016. Follow these instructions to setup an email account or additional email accounts to Outlook.
1. Open Outlook 2016 and select File tab on the top left of the page. Click on the Add Account button under Account information.
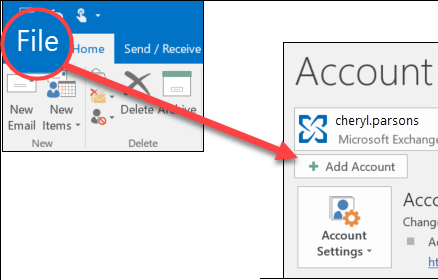
2. What you see next depends on your version of Outlook.
For Office 365 and Outlook 2016
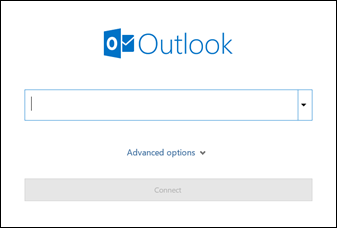
Enter your email address and click Connect.
3. If prompted, enter your password again, then select OK. Click Finish to start using your email account in Outlook.
How to Add or Remove Columns in the Outlook Inbox
Applies to: Outlook 2016
Applies To: Outlook 2016
You can add or remove columns in list views, such as the Inbox and other Mail folders, contact lists, or
task lists.
1. On the View tab, in the Current View group, click View Settings.

2. In the Advanced View Settings dialog box, click Columns.

3. In the Show Columns dialog box, in the Available columns list, click a column name, and then
click Add.

If the column that you want is not in the Available columns list, click the Select available columns from
box to see additional sets of columns.
To create a custom column, click New Column, enter a Name for the column, and then click the Type
and Format of information that you want the column to display.
To remove a column, in the Show these columns in this order list, click a column name, and then click
Remove.
Managing Focused Inbox for Outlook
Outlook for Windows
In Outlook for Windows, Focused Inbox is available only for Office 365, Exchange, and Outlook.com accounts. Directions can be found in the Files section which is located at the bottom right or click here: Outlook Android and Outlook IOS.
Turn Focused Inbox on
1. In Outlook, select the View tab.
2.Select Show Focused Inbox.
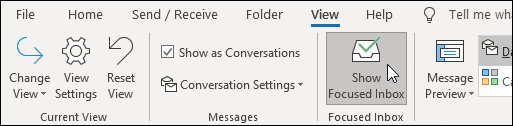
The Focused and Other tabs will appear at the top of your mailbox. You will be informed about email flowing to Other, and you can switch between tabs any time to take a quick look.
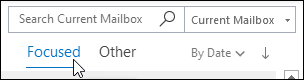
Change how your messages get organized
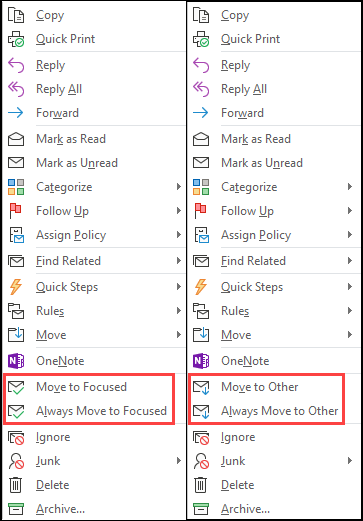
1. From your inbox, select the Focused or Other tab, and then right-click the message you want to move.
2. If you're moving from Focused to Other, select Move to Other if you want only the selected message moved. Select Always Move to Other if you want all future messages from the sender to be delivered to the Other tab.
If you're moving from Other to Focused, select Move to Focused if you want only the selected message moved. Select Always Move to Focused if you want all future messages from the sender to be delivered to the Focused tab.
Outlook on the Web
Turn on Focused Inbox
1. Open Outlook on the web.

2. At the top of the page, select Settings  .
3. Select the toggle next to Focused Inbox.
The Focused and Other tabs will appear at the top of your mailbox. You’ll be informed about email flowing to Other, and you can switch between tabs any time to take a quick look.
Change how your messages get organized
1. From your inbox, select the Focused or Other tab, and then right-click the message you want to move.
2. To move a message from Focused to Other, select Move > Move to Other inbox. Select Always move to Other inbox if you want all future messages from the sender to be delivered to the Other tab.
If you're moving a single message from Other to Focused, select Move > Move to Focused inbox. Select Always move to Focused inbox if you want all future messages from the sender to be delivered to the Focused tab.
Classic Outlook on the web
Turn Focused Inbox on
1.Open Outlook on the web.
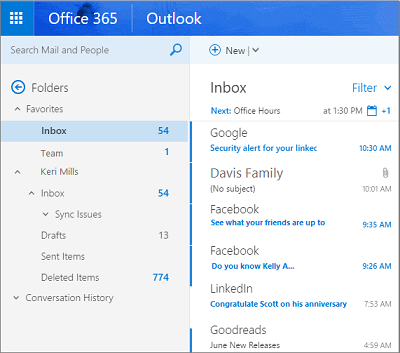
2. Select Settings > Display settings > Focused Inbox.
3. Under When email is received, select Sort messages into Focused and Other. The Focused and Other tabs will appear at the top of your mailbox. You’ll be informed about email flowing to Other, and you can switch between tabs any time to take a quick look.
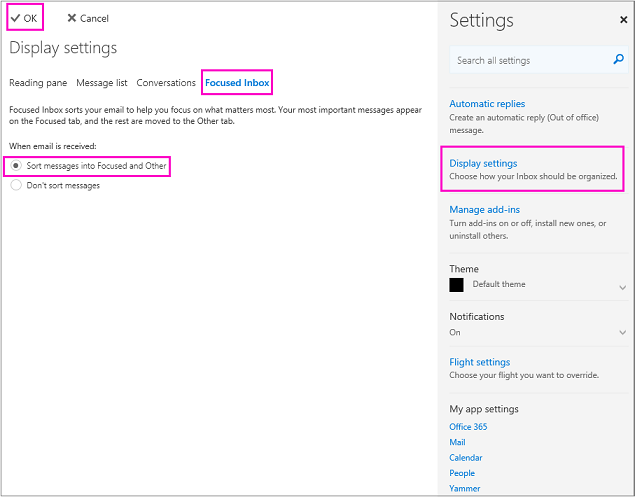
4. Click OK.
Change how your messages get organized
1. From your inbox, select the Focused or Other tab, and then right-click the message you want to move.
2. If you're moving a single message from Focused to Other, select Move to Other inbox. Select Always move to Other inbox if you want all future messages from the sender to be delivered to the Other tab.
If you're moving a single message from Other to Focused, select Move to Focused inbox. Select Always move to Focused inbox if you want all future messages from the sender to be delivered to the Focused tab.

Outlook.com, Hotmail.com
Turn on Focused Inbox
1. Open Outlook.com or Hotmail.com.
2. Select Settings , then turn on Focused Inbox.
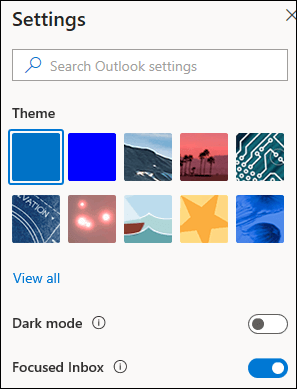
3. At the top of your mailbox, in the email messages list, select between Focused and Other. You can switch between the tabs any time to take a quick look.
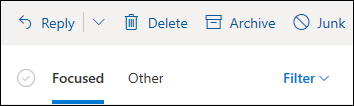
Change how your messages get organized
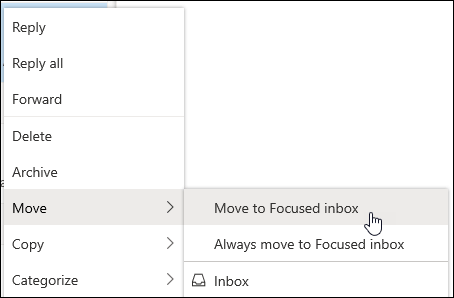
1. From your inbox, select the Focused or Other tab, and then right-click the message you want to move.
2. If you're moving a single message from Focused to Other, select Move > Move to Other inbox. Select Always move to Other inbox if you want all future messages from the sender to be delivered to the Other tab.

If you're moving a single message from Other to Focused, select Move > Move to Focused inbox. Select Always move to Focused inbox if you want all future messages from the sender to be delivered to the Focused tab.
Outlook for Mac
In Outlook 2016 for Mac, Focused Inbox is only available for Office 365 Business Emails.
Turn Focused Inbox on
1. Open Outlook 2016 for Mac.
2. On the Organize tab, select Focused inbox.
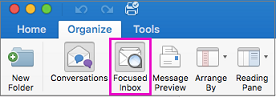
The Focused and Other tabs will appear at the top of your inbox. You’ll be informed about email flowing to Other, and you can switch between tabs any time to take a quick look.
Tip: You can set the badge count—the count of unread mail—to include only the messages in the Focused list. See Outlook > Preferences > Notifications and Sounds > Badge count to adjust this setting.
Change how your messages get organized
1. From your inbox, select the Focused tab, and then select the message you want to move.
2. Select Message > Move to Other if you want only the selected message moved. Select Message > Always Move to Other if you want all future messages from the sender to be delivered to the Other tab.
Select Message >Move to Focused if you want only the selected message moved. Select Message > Always Move to Focused if you want all future messages from the sender to be delivered to the Focused tab.

Mail for Windows 10
Turn Focused Inbox on
1. In Mail for Windows 10, select Settings > Focused Inbox.
2. Slide Sort messages into Focused and Other to On.
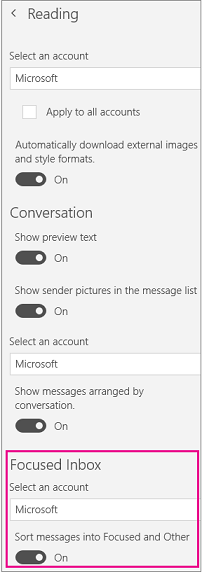
The Focused and Other tabs will appear at the top of your inbox. You’ll be informed about email flowing to Other, and you can switch between tabs any time to take a quick look.
Move messages from Focused to Other
1. From your inbox, select the Focused tab, and then right-click the message you want to move.
2. Select one of the following:
Move messages from Other to Focused
1. From your inbox, select the Other tab, and then right-click the message you want to move.
2. Select one of the following:
How to Access Public Folders in Outlook
-
Go to the Folders section of Outlook by clicking the ellipsis at the bottom of the window and choosing Folders.
-
Public Folders will appear as an option at the end of the Navigation pane, under your Mail folders.
-
Expand the Public Folders -- YourEmailAddress" folder in the left hand column. To view the subfolders by clicking the triangle next to it, and continue in this way until you get to the folder you wish to access.
If you are unable to access or find the Public Folder, you may not have permissions to access it.
How to Set Up the Outlook Desktop App
- Click the Windows Start button on the taskbar, usually in the bottom left corner.

- From the Start menu, open Outlook Desktop Client: All Programs -> Outlook.
Hint: You can pin Outlook to your taskbar by right-clicking the icon and selecting “Pin to Taskbar”.

- Click Next >

- Select Yes, then click Next >

- If your name and email address are not already shown, enter your email address and password, then click Next >

Hint: Use the same password you use to login to your computer. Email format examples: Firstname.Lastname@sjeccd.edu, Firstname.Lastname@evc.edu, Firstname.Lastname@sjcc.edu
- While the settings are being searched, an SJECCD Secure Login screen should appear.

7. Enter your email address and email/network password, then select Login.

Hint: Email format examples: Firstname.Lastname@sjeccd.edu, Firstname.Lastname@evc.edu, Firstname.Lastname@sjcc.edu. Use the same password you use to login to your computer.
8. Congratulations, your email account should now be configured and ready to use. Select Finish.

9. Outlook will open and begin syncing your email. When it finishes, you should see “All folders are up to date” and “Connected” at the bottom.
